透明度测试
post by:追风剑情 2016-10-23 12:03
透明度测试:只要一个片元的透明度不满足条件(通常是小于某个阈值),那么它对应的片元就会被舍弃。被舍弃的片元将不会再进行任何处理,也不会对颜色缓冲产生任何影响;否则,就会按照普通的不透明物体的处理方式来处理它。
通常,我们会在片元着色器中使用clip函数来进行透明度测试。clip是Cg中的一个函数,它的定义如下。
函数: void clip(float4 x); void clip(float3 x); void clip(float2 x); void clip(float1 x); void clip(float x);
参数: 裁剪时使用的标量或矢量条件。
描述: 如果给定参数的任何一个分量是负数,就会舍弃当前像素的输出颜色。它等于下面的代码:
void clip(float4 x){
if (any(x < 0))
discard;
}
discard指令用于显式剔除该片元。
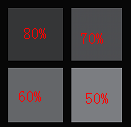
准备张有不同透明度区域的图
Shader代码
Shader "Custom/Chapter8-AlphaTest" {
	Properties {
		_Color ("Main Tint", Color) = (1, 1, 1, 1)
		_MainTex ("Base (RGB)", 2D) = "white" {}
		_Cutoff ("Alpha Cutoff", Range(0, 1)) = 0.5
	}
	SubShader {
		//Unity5中Queue设置成AlphaTest;
                //"IgnoreProjector"="true" 这个Shader不会受到投影器(Projectors)的影响
                //RenderType标签通常被用于着色器替换功能
                //通常,使用了透明度测试的Shader都应该在SubShader中设置这三个标签
		Tags { "Queue"="Geometry" "IgnoreProjector"="true" "RenderType"="TransparentCutout" }
		LOD 200
		Pass {
                        //LightMode标签是Pass标签中的一种,它用于定义该Pass在Unity的光照流水线中的角色
                        //只有定义了正确的LightMode我们才能正确得到一些Unity的内置光照变量,例如_LightColor0
			Tags {"LightMode"="ForwardBase"}

			CGPROGRAM
			#pragma vertex vert
			#pragma fragment frag
			#include "UnityCG.cginc"
			#include "Lighting.cginc"

			fixed4 _Color;
			sampler2D _MainTex;
			float4 _MainTex_ST;
			fixed _Cutoff;

			struct a2v {
				float4 vertex : POSITION;
				float3 normal : NORMAL;
				//Unity会将模型的第一组纹理坐标存储到该变量中
				float4 texcoord : TEXCOORD0;
			};

			struct v2f {
				float4 pos : SV_POSITION;
				float3 worldNormal : TEXCOORD0;
				float3 worldPos : TEXCOORD1;
				float2 uv : TEXCOORD2;
			};

			v2f vert(a2v v) {
				v2f o;
				o.pos = mul(UNITY_MATRIX_MVP, v.vertex);
				o.worldNormal = mul(v.normal, (float3x3)_World2Object);
				//Unity5中可用UnityObjectToWorldNormal()函数得到o.worldNormal
				//o.worldNormal = UnityObjectToWorldNormal(v.normal);
				o.worldPos = mul(_Object2World, v.vertex).xyz;
				o.uv = v.texcoord.xy*_MainTex_ST.xy+_MainTex_ST.zw;
				//或者调用Unity内建的函数计算o.uv
				//o.uv = TRANSFORM_TEX(v.texcoord, _MainTex);
				return o;
			}

			fixed4 frag(v2f i) : COLOR {
				fixed3 worldNormal = normalize(i.worldNormal);
				//fixed3 worldLightDir = normalize(UnityWorldSpaceLightDir(i.worldPos));
				fixed3 worldLightDir = normalize(_WorldSpaceLightPos0.xyz);//只适合场景中仅有一个平行光
				fixed4 texColor = tex2D(_MainTex, i.uv);
				clip(texColor.a - _Cutoff);
				//clip函数相当于下面代码的功能
				//if((texColor.a - _Cutoff) < 0.0){
					//discard;
				//}
				fixed3 albedo = texColor.rgb * _Color.rgb;
				fixed3 ambient = UNITY_LIGHTMODEL_AMBIENT.xyz * albedo;
				fixed3 diffuse = _LightColor0.rgb * albedo * max(0, dot(worldNormal, worldLightDir));
				return fixed4(ambient + diffuse, 1.0);
			}
			ENDCG
		}
	}
	//确保我们编写的SubShader无法在当前显卡上工作时可以有合适的代替Shader,
	//还可以保证使用透明度测试的物体可以正确地向其他物体投射阴影
	FallBack "Transparent/Cutout/VertexLit"
}
透明度测试得到的透明效果很“极端”——要么完全透明,要么完全不透明,它的效果往往像在一个不透明物体上挖了一个空洞。而且,得到的透明效果在边缘处往往参差不齐,有锯齿,这是因为在边界处纹理的透明度的变化精度问题。为了得到更加柔滑的透明效果,就可以使用透明度混合。
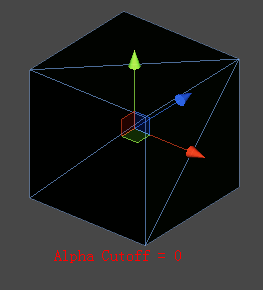
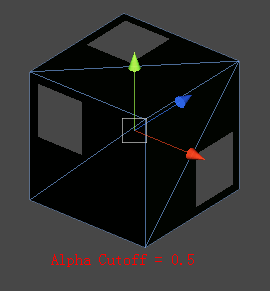
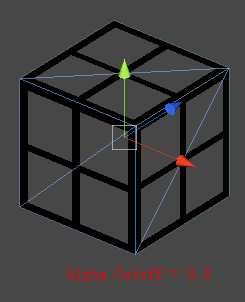
不同Alpha Cutoff值效果
评论:
发表评论:


